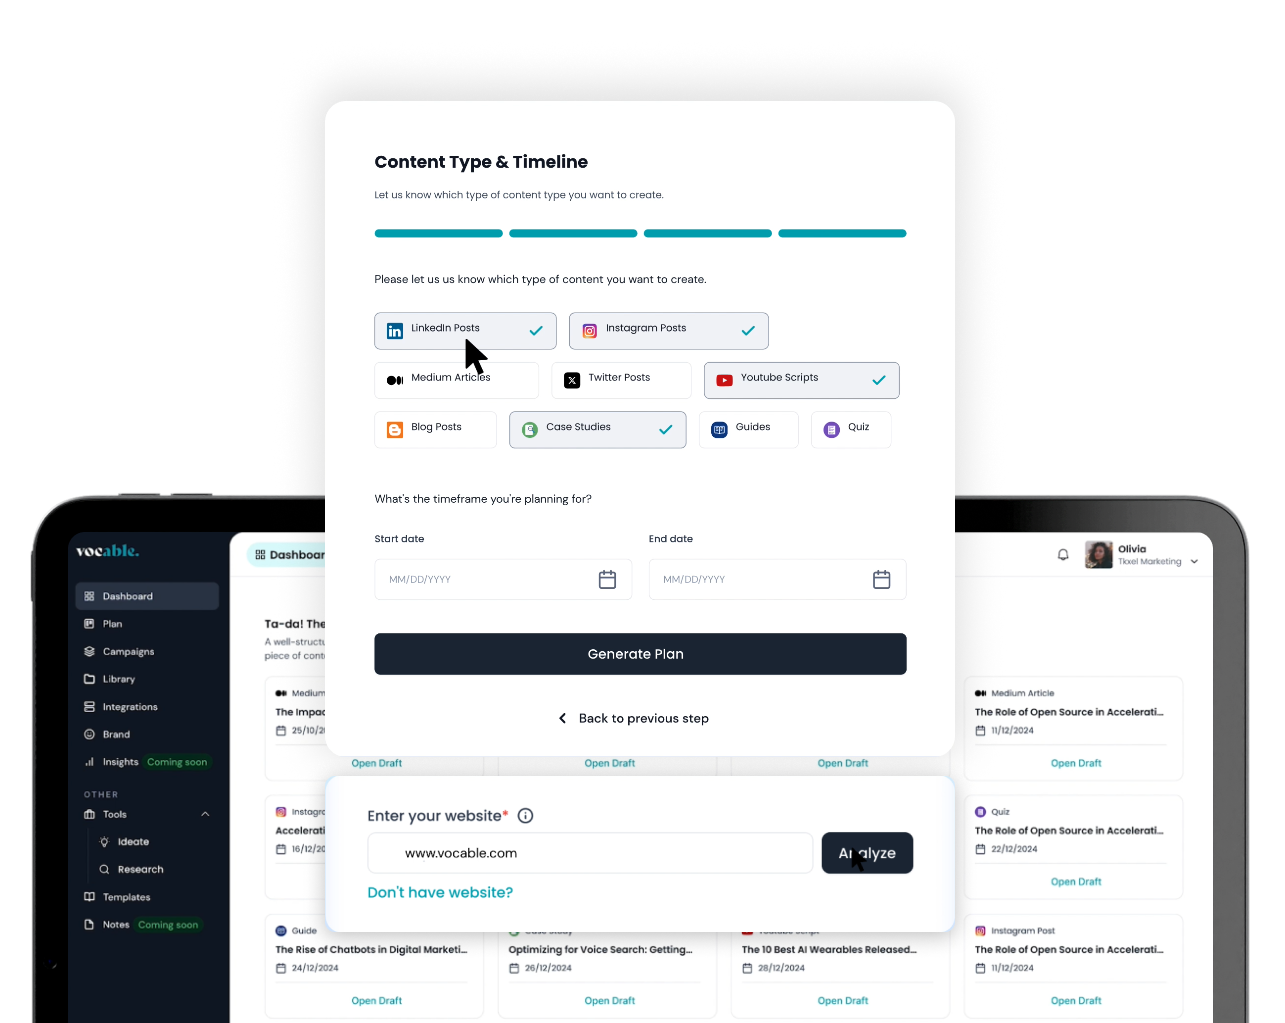
Integrate and Publish Directly to Your Wix Blog
Get our FREE Email Course
Receive our 7-day email course and learn how to leverage AI to transform your content creation in just one week.
Share this article


By integrating Wix with Vocable, you can seamlessly publish your Vocable content to your Wix blog. Before you begin, ensure:
- You have a Vocable account with access to Integrations.
- You have a Wix account with administrative privileges (the ability to create and manage API keys).
Click to watch the full tutorial … Or scroll below to follow the written step-by-step process.

Step-by-Step Instructions
1. Log Into Vocable
- Go to vocable.ai and log in with your Vocable credentials.
- From your main dashboard, locate the left-side navigation bar.
2. Access “Integrations”
- In the left navigation menu, look for Integrations.
- Click on Integrations to open the integrations management page.
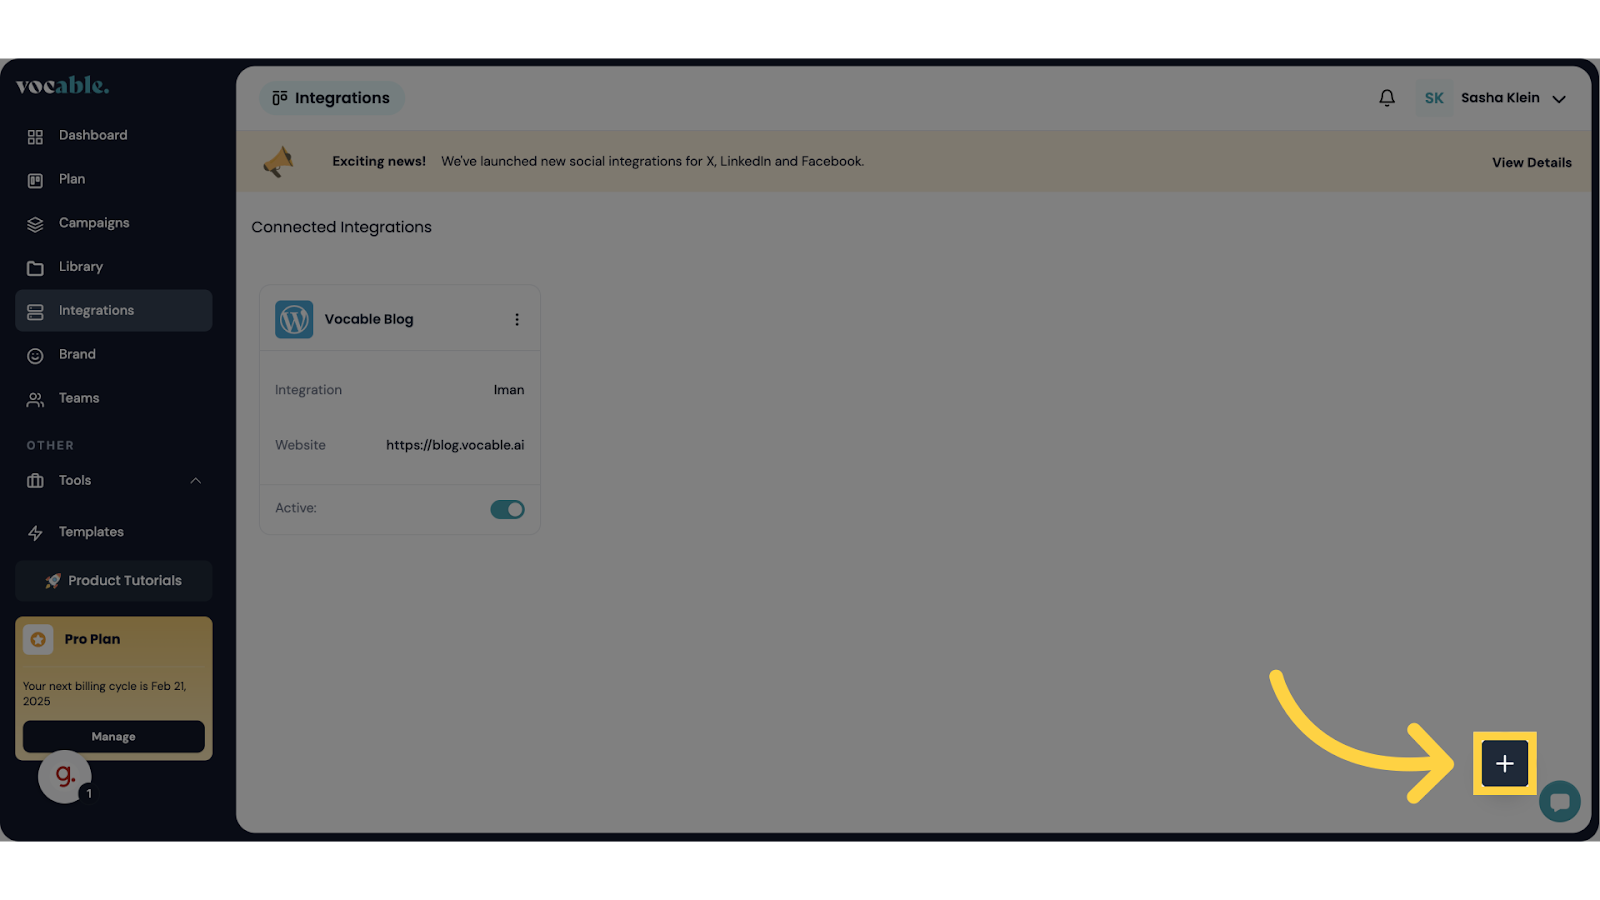
3. Add a New Integration
- On the Integrations page, find the + icon (typically in the bottom-right corner).
- Click on + to start creating a new integration.
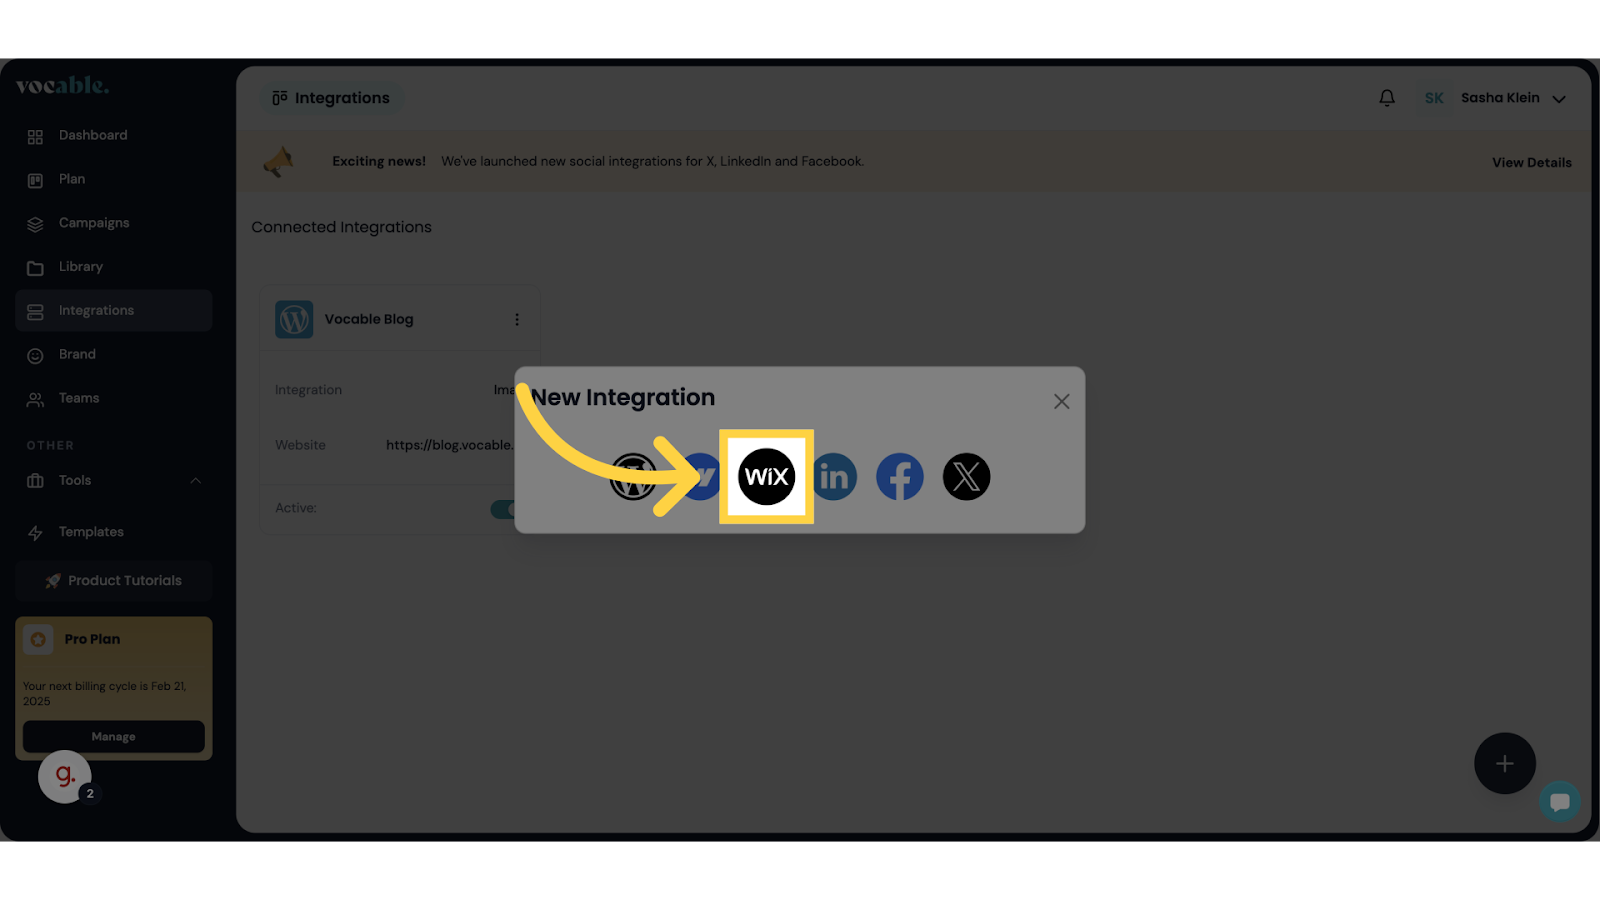
4. Choose the Wix Integration
- A list or grid of available integrations will appear.
- Select the Wix logo to proceed with connecting your Wix CMS.
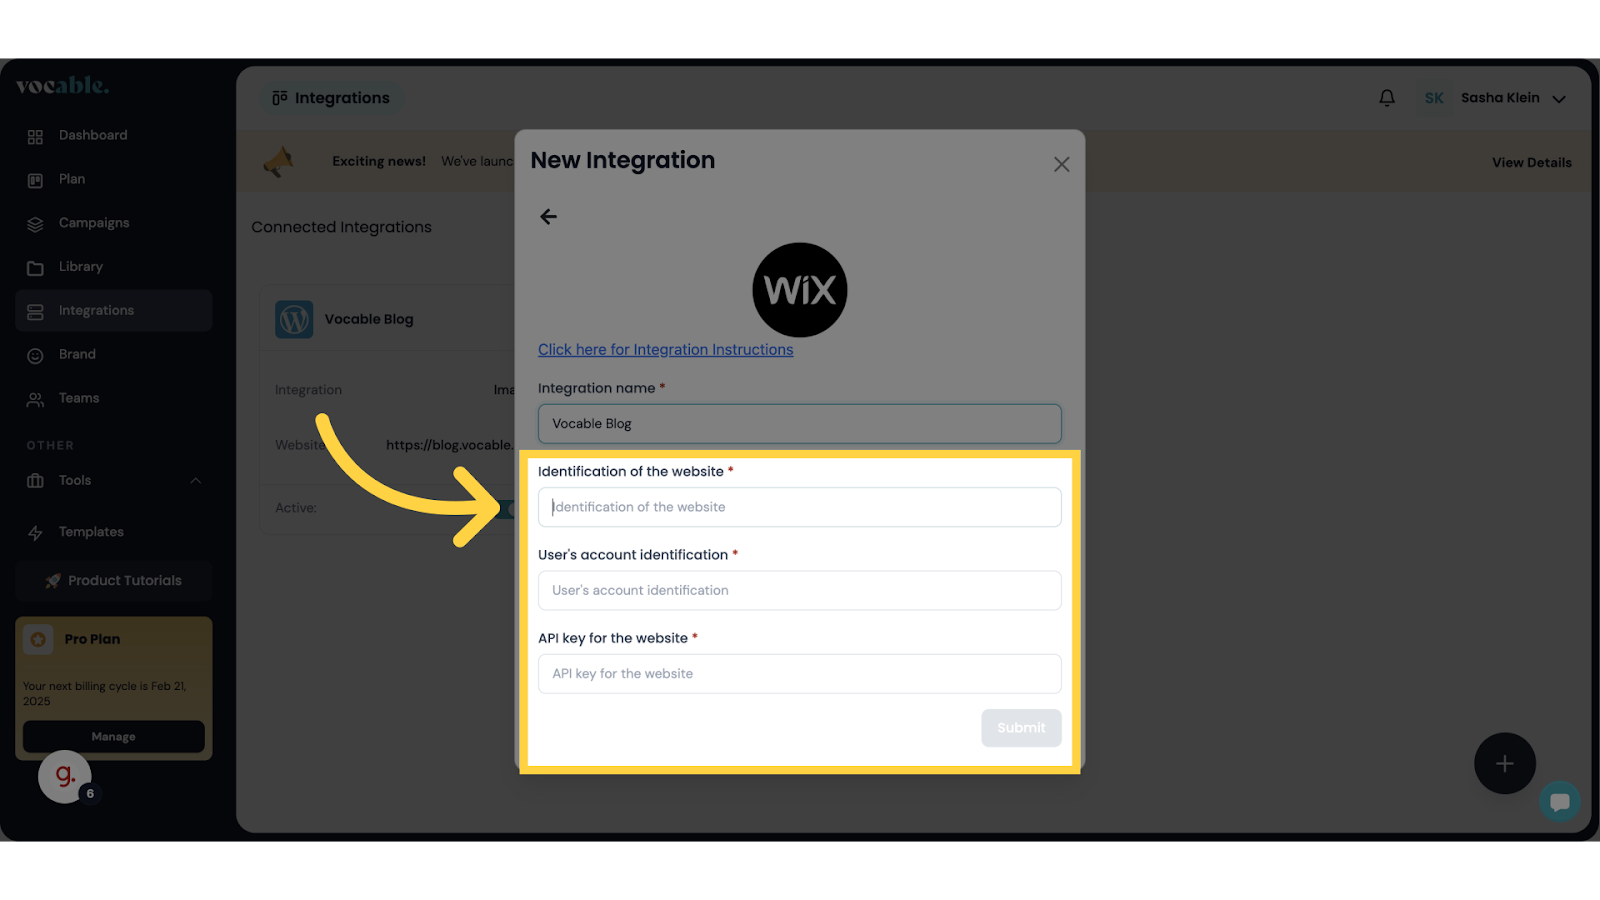
5. Name Your Integration
- Assign a name to your new integration.
Tip: Use the same name as your blog or something descriptive (e.g., “My Travel Blog – Wix”).
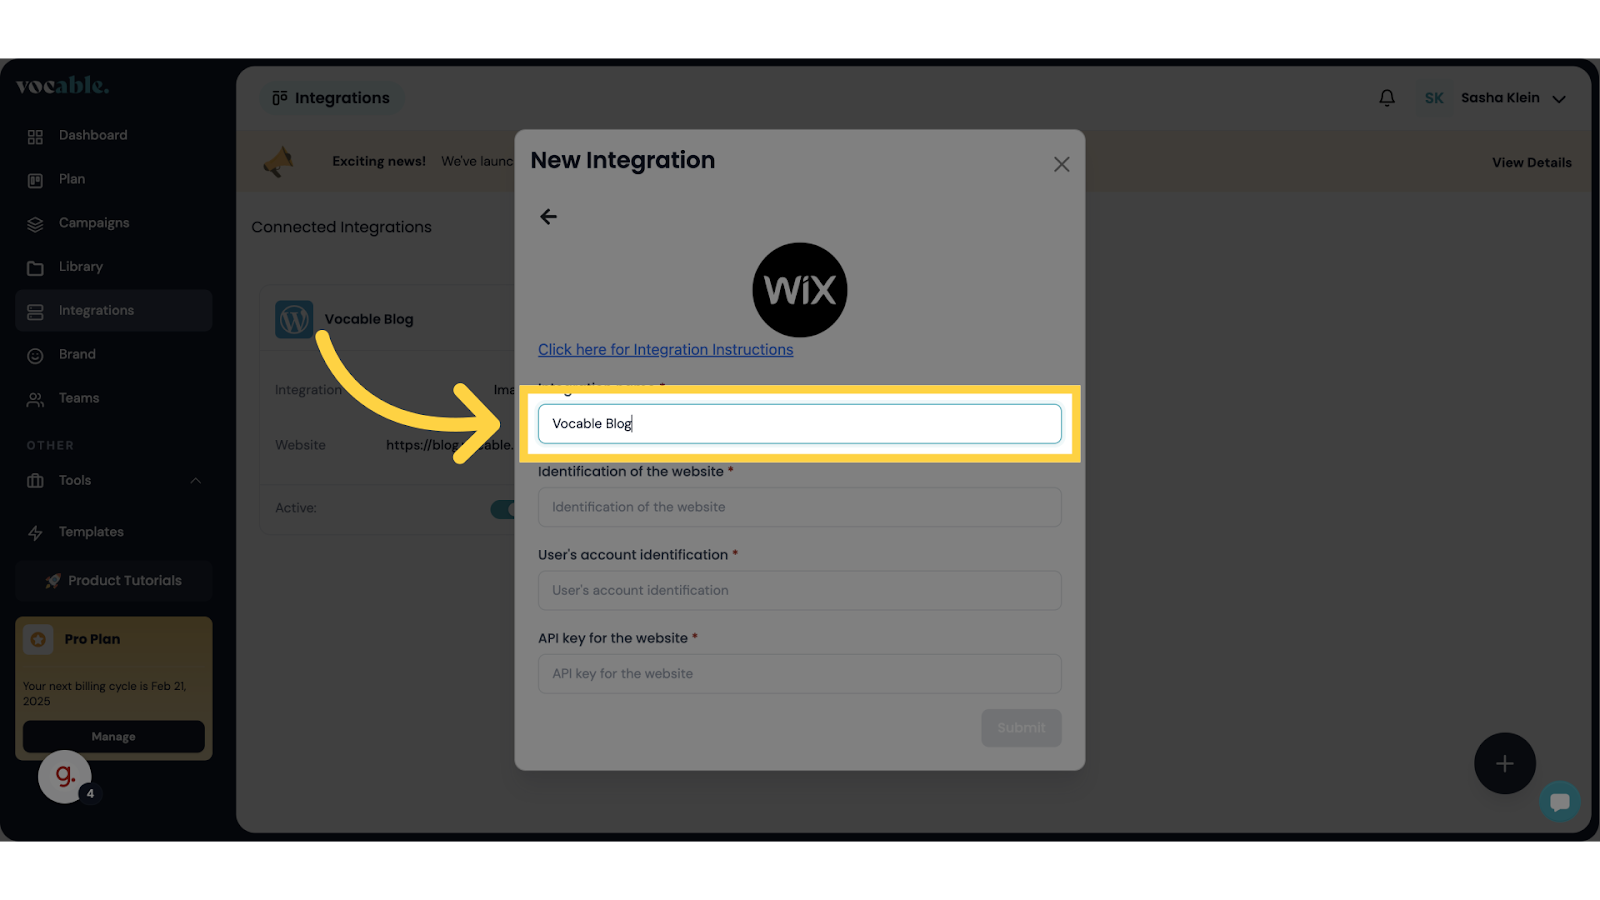
6. Gather Wix Credentials
At this point, you will be prompted to enter several IDs and tokens from your Wix account. You’ll need to open a new browser tab and log into Wix.
You’ll need:
- API Key (token)
- Account ID
- Website ID (retrieved from your blog’s URL)
The next few steps walk you through obtaining these details.
Retrieving Your Wix API Key & Account ID
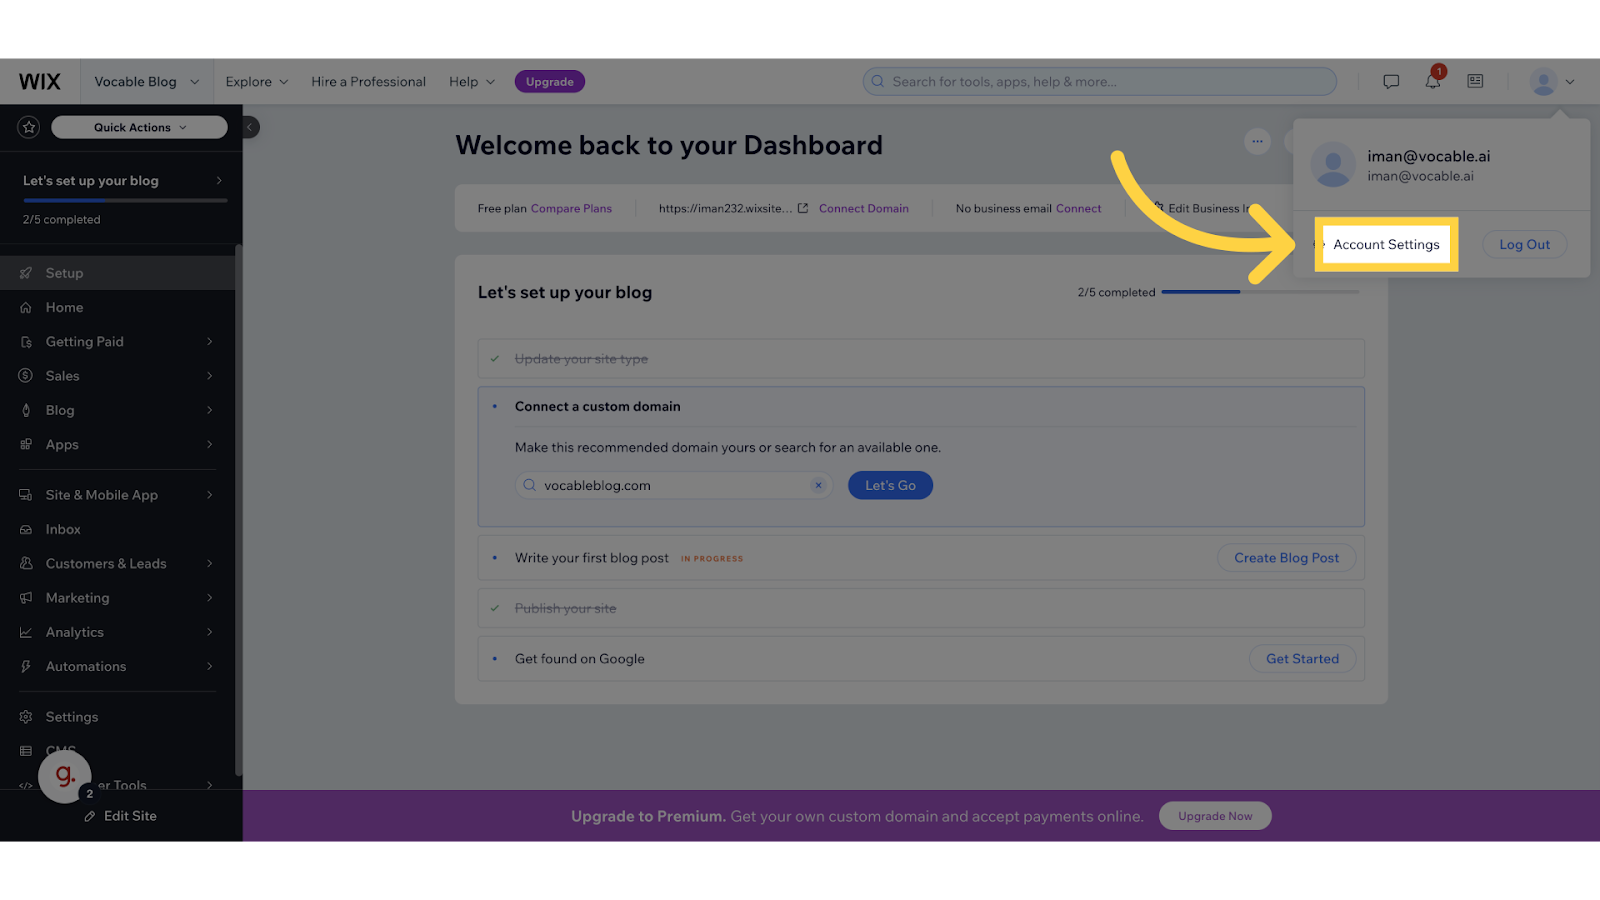
7. Open Your Wix Account Settings
- Log into Wix and go to your Wix dashboard.
- Click your profile avatar in the top-right corner.
- Select Account Settings from the dropdown.
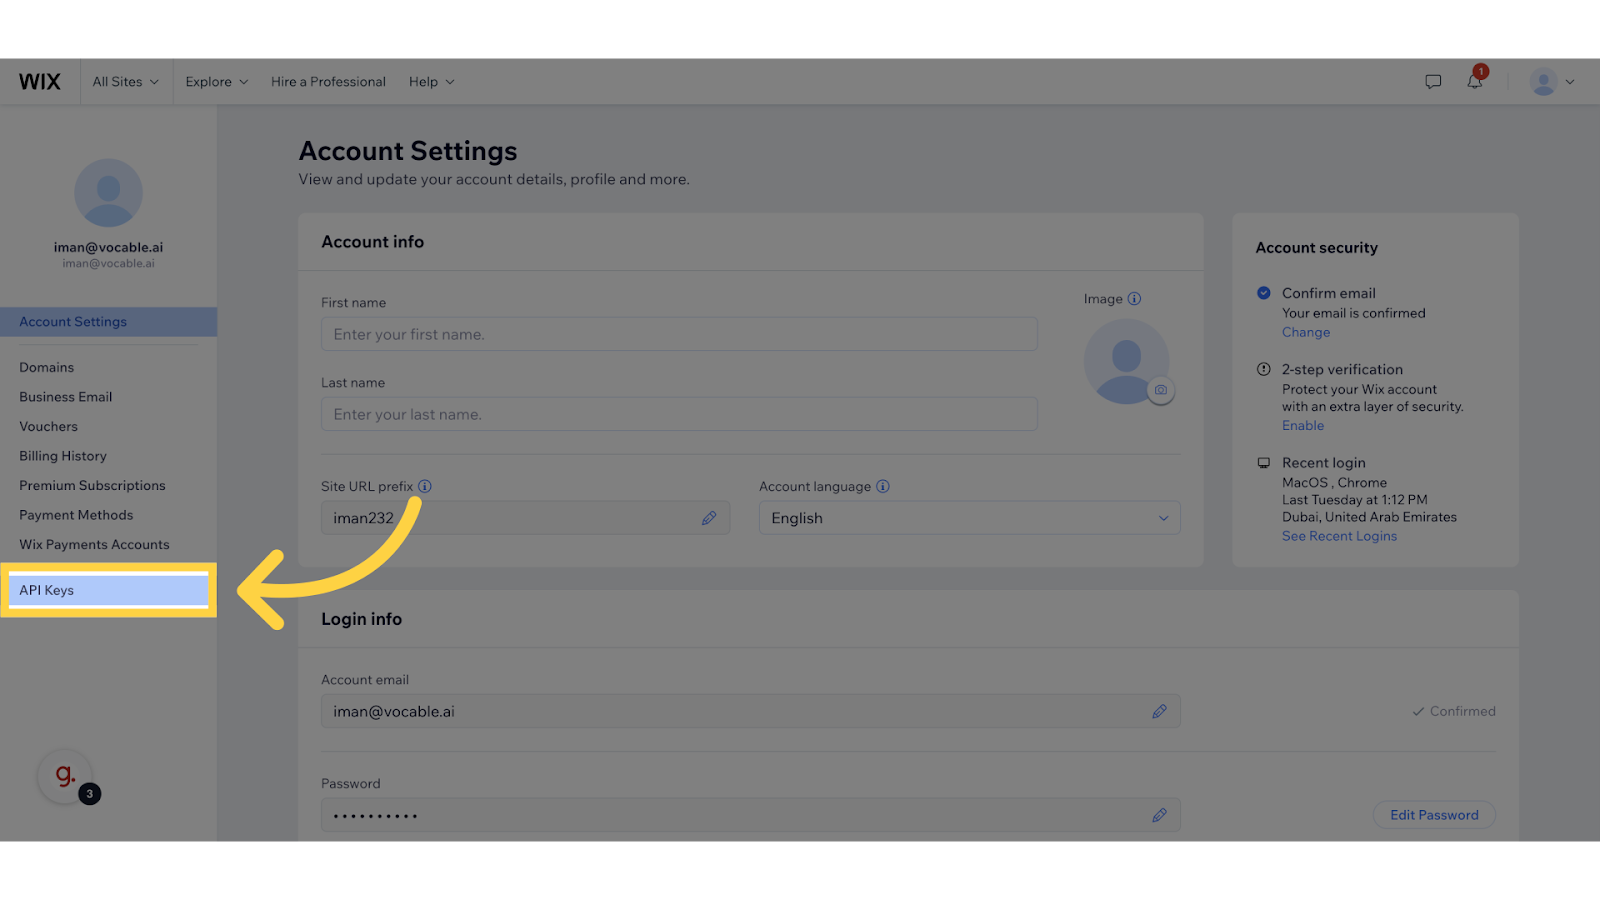
8. Click on “API Keys”
- In Account Settings, find the left-side menu.
- Click on API Keys to manage and create your Wix API keys.
9. Generate a New API Key
- On the API Keys page, locate the Generate API Key button.
- Click Generate API Key to start the process.
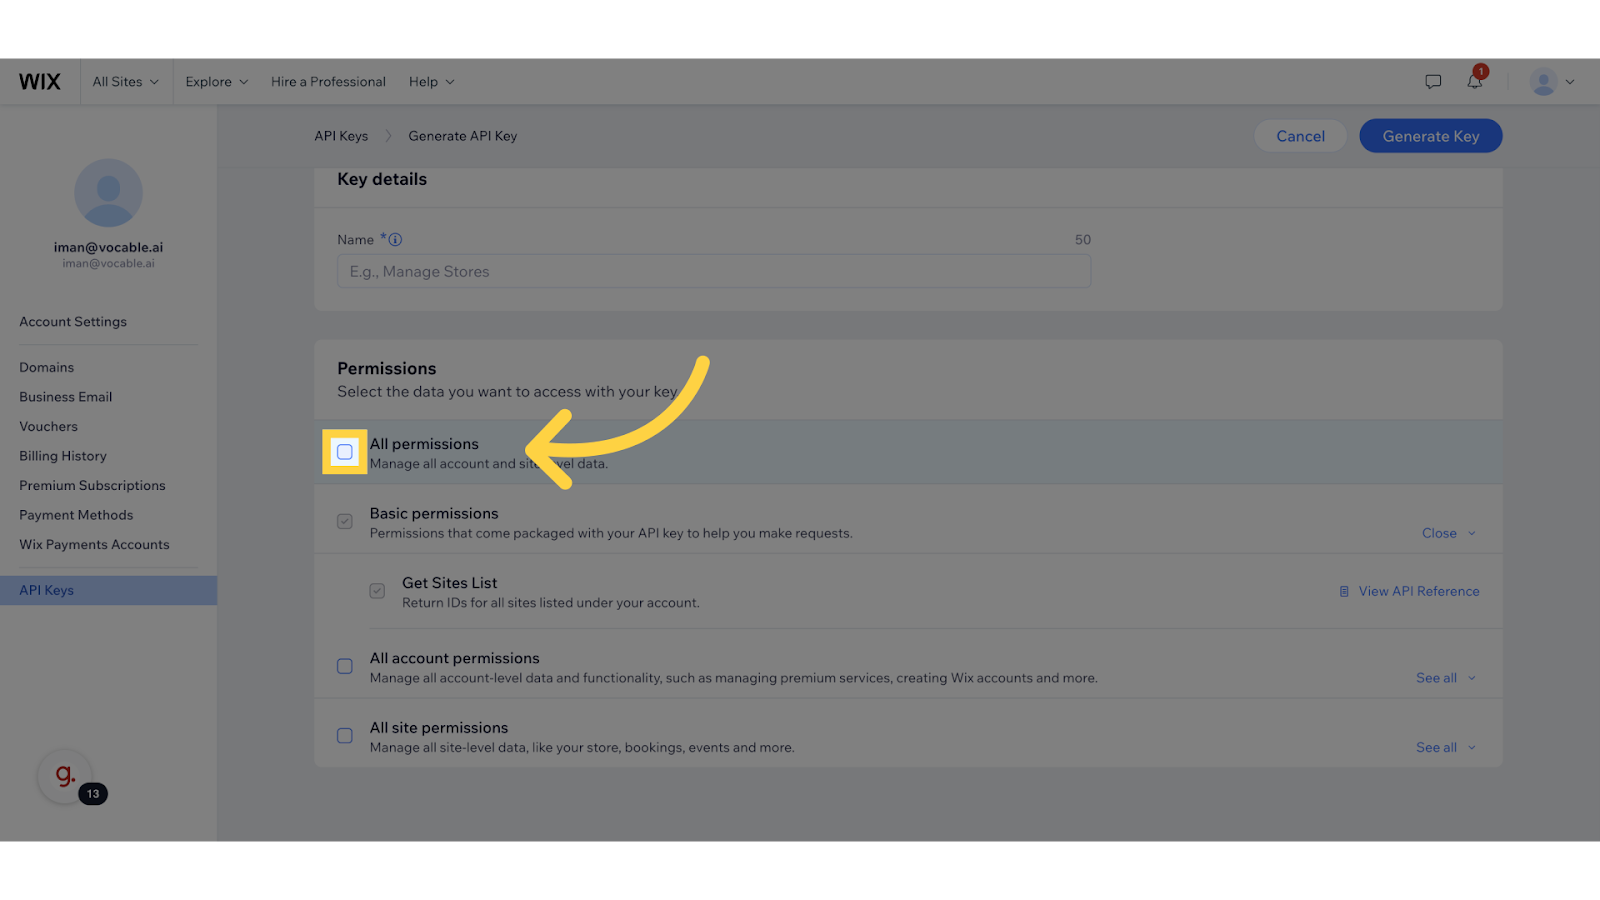
10. Adjust Permissions
- A prompt will appear asking you to set permissions for this new key.
- Make sure you enable all required permissions (e.g., read/write) by checking the relevant boxes.
- Important: If you want full functionality for posting blog content, ensure you check the first box or any box labeled to allow both reading and writing to your site’s content.
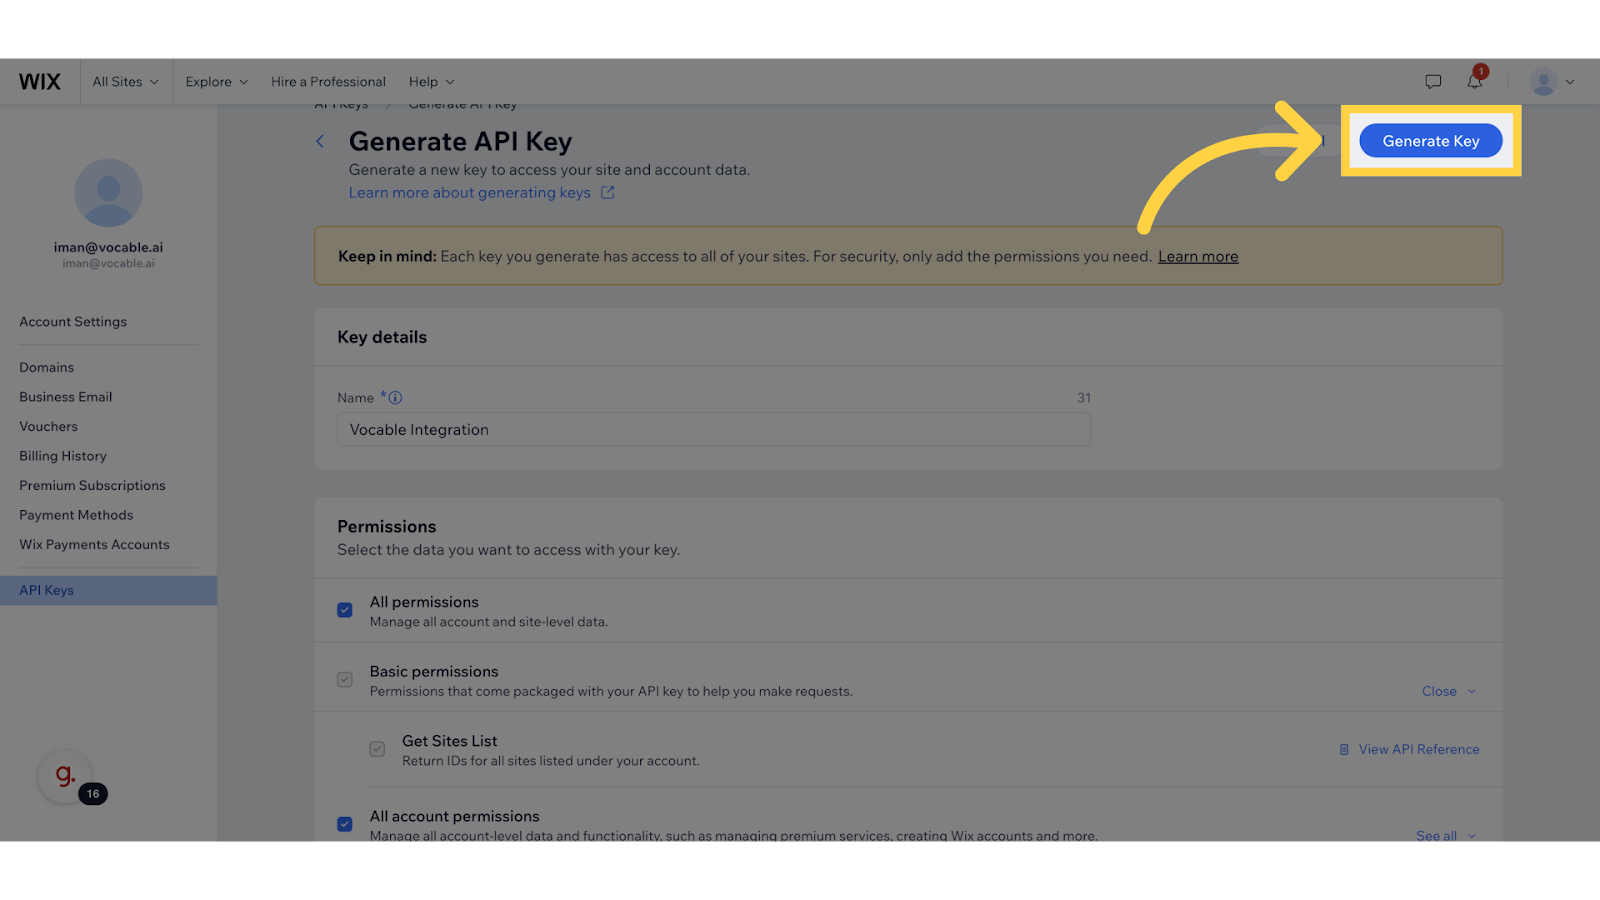
11. Finalize the Key Generation
- Click on Generate Key at the top-right of the permissions dialog.
- A new token will appear in a pop-up window.
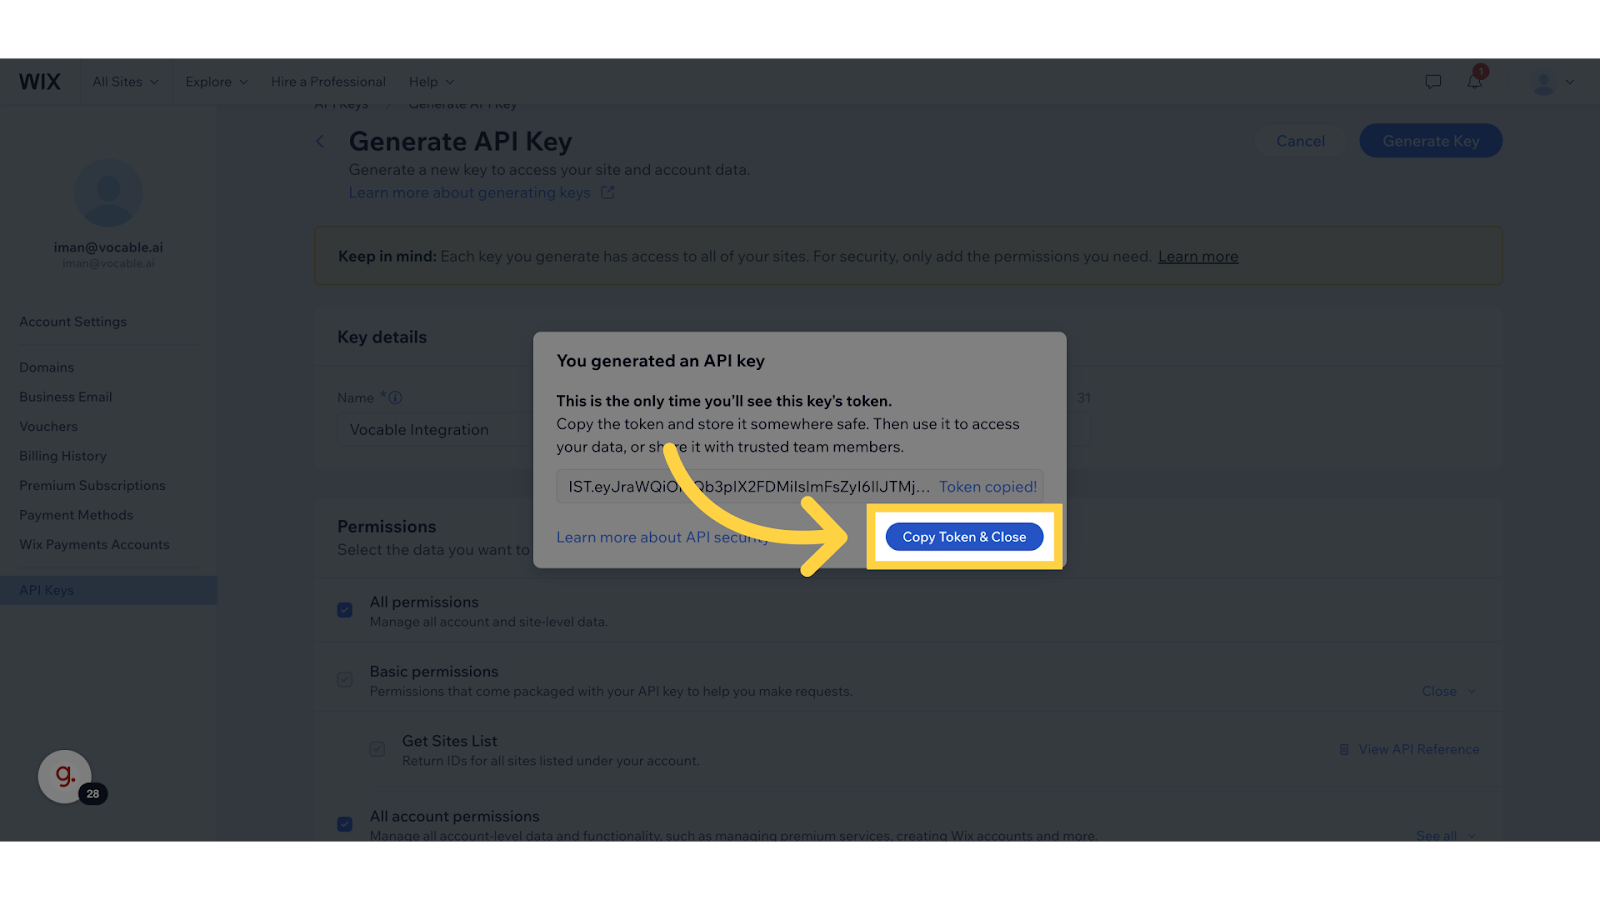
12. Copy Token & Close
- Click Copy Token & Close to copy your new API Key.
- Important: Store this token in a secure location (like a password manager or a safe notes file). You cannot view the token again once you close the pop-up.
- Return to Vocable’s Wix Integration pop-up and paste the token into the appropriate field.
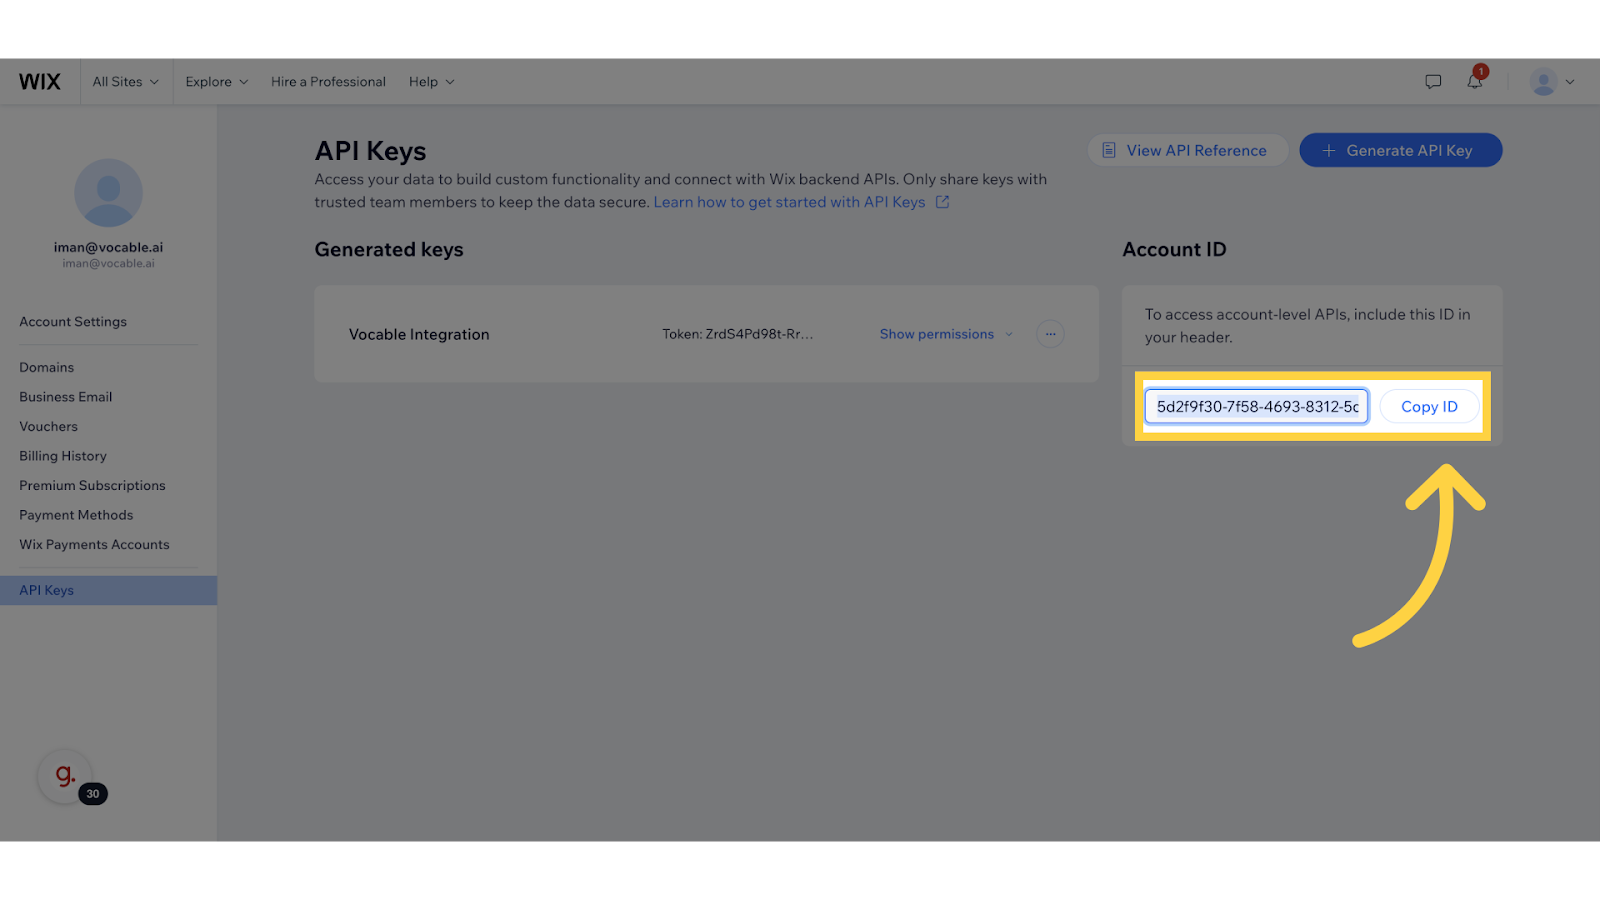
13. Copy Your Account ID
- In the same Wix API Keys section, your User’s Account ID (or something similarly labeled) should appear on the right side.
- Click Copy ID.
- Paste it into the corresponding field in Vocable’s Wix Integration pop-up.
Retrieving Your Website ID
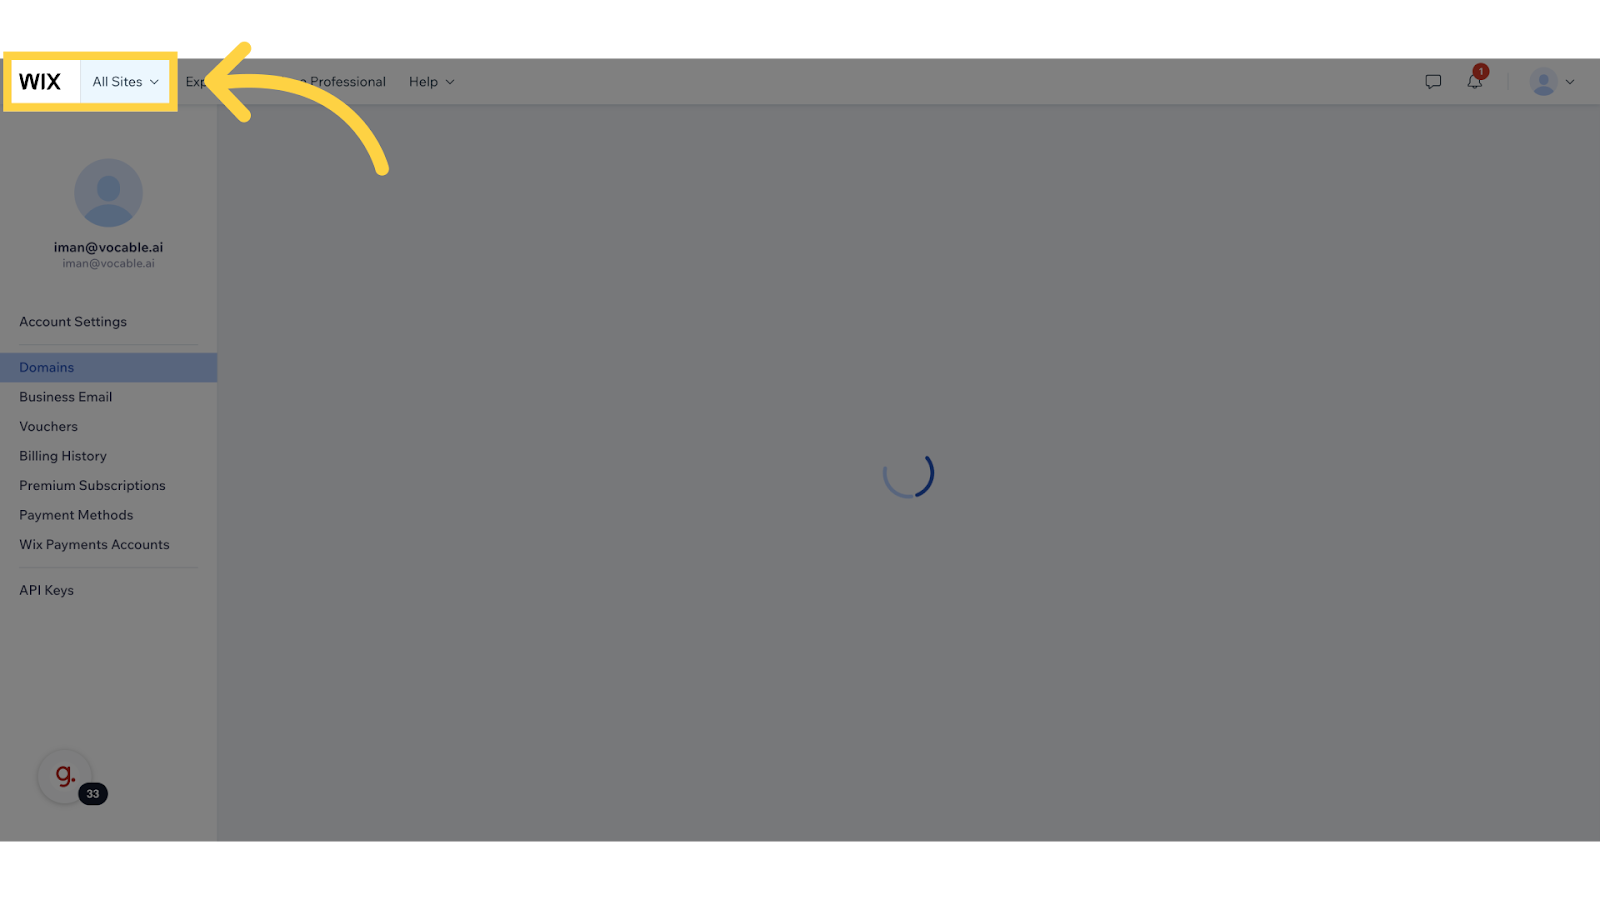
14. Navigate to “All Sites” in Your Wix Dashboard
- Still in the Wix dashboard, click All Sites (usually near the top-left or in the main dashboard navigation).
15. Choose the Correct Website
- Select the blog/website you want to integrate with Vocable.
- Once selected, a new URL will load in your browser.
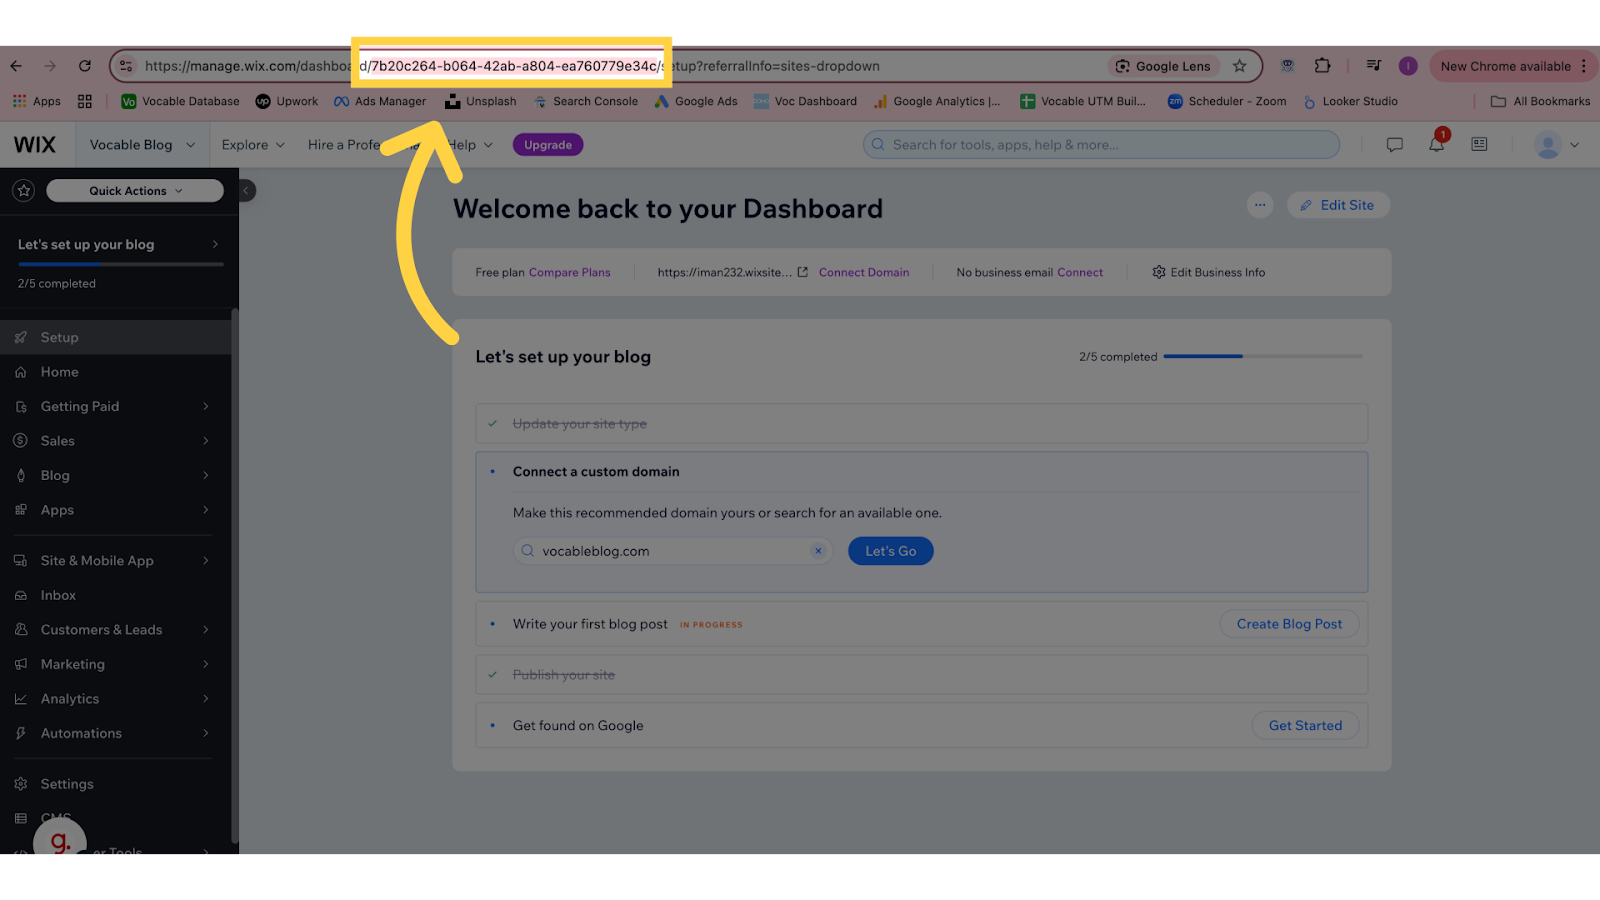
16. Find Your Website ID in the URL
- Look closely at the URL of your Wix site dashboard. It often contains a query parameter like
?siteId=XXXXXXXXXXXX. - Copy the Website ID (the string of characters or numbers that follow
siteId=). - Paste it into the Website ID field in Vocable’s Wix Integration pop-up.
Completing the Integration
17. Submit Your Wix Information in Vocable
- Confirm you have:
- API Key (Token)
- Account ID
- Website ID
- Paste each into its corresponding field in the Vocable Wix Integration pop-up.

18. Click “Submit”
- After entering all the required details, click Submit.
- You’ll see a confirmation message if everything is set up correctly.
19. Verify Your Integration
- Once you see the success message, your Wix integration is active.
- Optionally, test by creating a quick draft post in Vocable and publishing it to your Wix blog to ensure everything works smoothly.
Troubleshooting & Support
- Invalid Credentials: If you receive an error stating your credentials are invalid, double-check the API key and IDs. Make sure there are no typos or extra spaces.
- Lost API Key: If you lose the token you just generated, you will need to create a new one in Wix. Unfortunately, Wix does not let you view the same token again for security reasons.
- Permission Errors: Verify you have selected the correct permissions when generating the API key. Without the right permissions, Vocable won’t be able to publish to your blog.
If you run into any issues or have questions, feel free to email our support team at support@vocable.ai. We’re here to help!
Related Guides
 Set Up A New Brand Profile Using a URL
 Use Vocable to Automate Your Content
Let our AI plan, draft, and optimize your content marketing.
Start Your Free TrialStill Need help?
We’re here to assist you!
If you’re stuck or have questions, our support team is ready to assist. Reach out, and we’ll get you back on track.
Contact Us
Special Limited Time Offer
Start Using AI For Content Marketing In 7 Days with our Free AI Crash Course
Send Me The Free Email CourseWhat You Will Learn


Learn AI Content Marketing
With Real Examples
Build Your AI-Led Content
Operations Strategy
Access 4700+ Prompts
Database
Bonus #1
4,000+ Prompts for Content Marketing
Bonus #2
List of AI Content Marketing Tools
And Get Answers to Your AI Content Challenges
Join Vocable's AI Content Creator Community