Integrate and Publish to Your WordPress
Get our FREE Email Course
Receive our 7-day email course and learn how to leverage AI to transform your content creation in just one week.
Share this article


This guide will walk you through the process of integrating WordPress with Vocable. Click here to watch the full tutorial.
From adding the integration to submitting the details, follow these engaging steps to streamline your publishing process to wordpress efficiently.
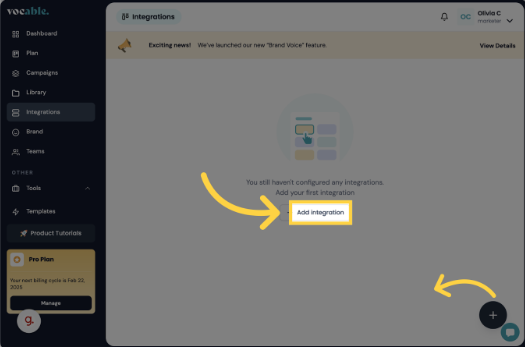
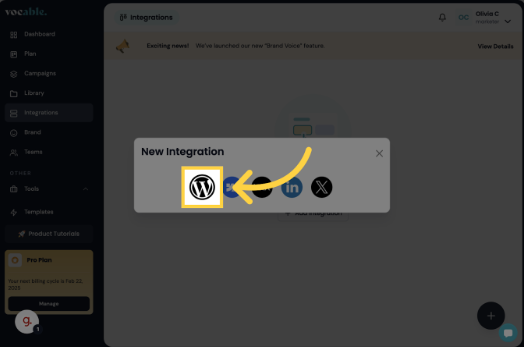
Go to vocable.ai and click on “Integrations”
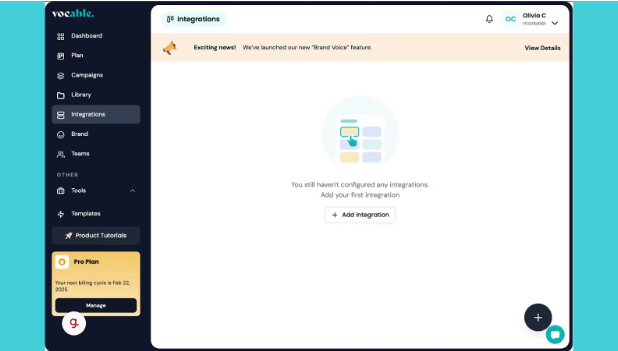
Under your integrations tab, click on “Add integration” or the plus button on the bottom right.
Proceed by clicking on the WordPress logo.
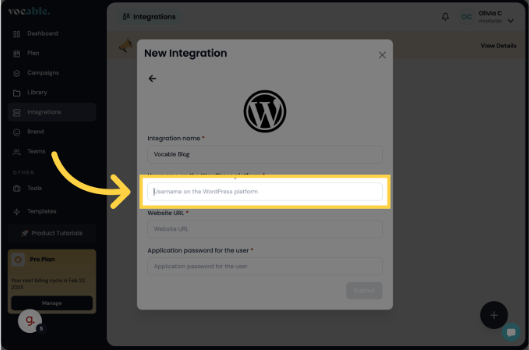
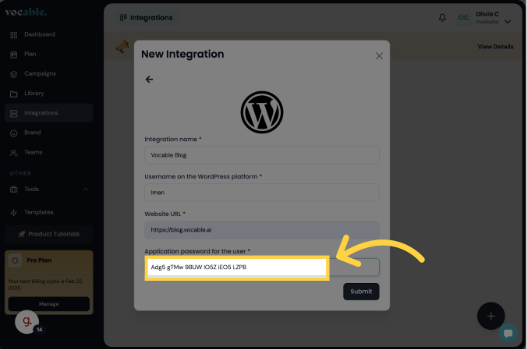
Enter your blog name

Provide your WordPress username (this is the same username you use when logging into your wordpress).
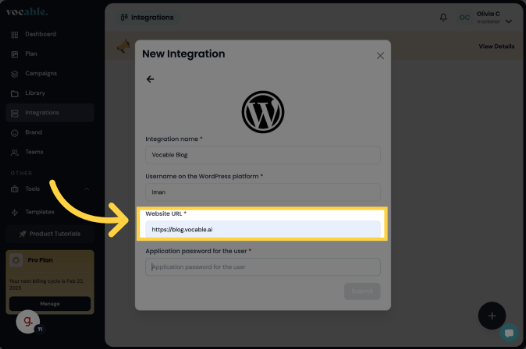
Provide your blog link, make sure to write the full URL, including the https
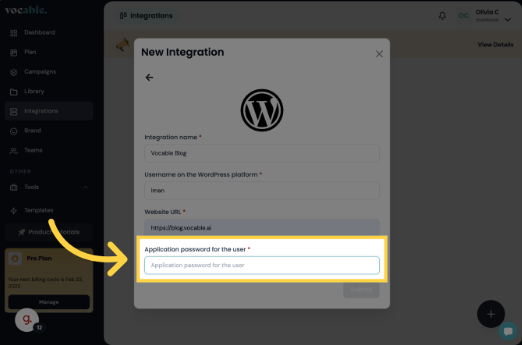
For this step you need to head over to wordpress to generate and copy your application password.
Once on wordpress, click on “users” on the left navigation bar and then click on “profile”

Scroll all the way down until you see the section called “Application Passwords”
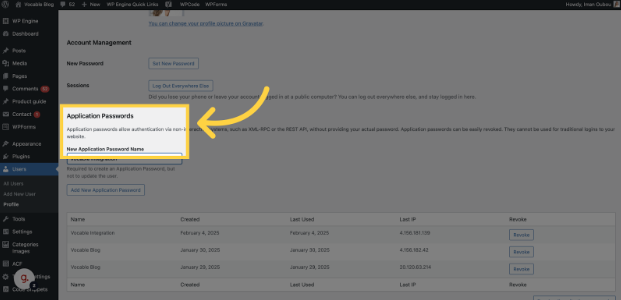
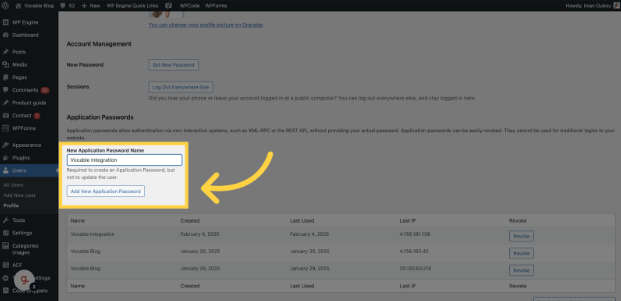
Under that, type up what you want to name your integration, for example “vocable Integration” and then click on “Add New Application”
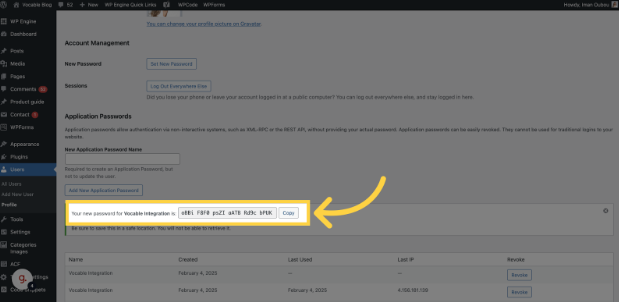
Your new password for this integration will be generated. Click “Copy” to copy the full password.
Now go back to your vocable’s integration window and paste your new application password and hit submit.
You will then see your new wordpress integration appear as active.

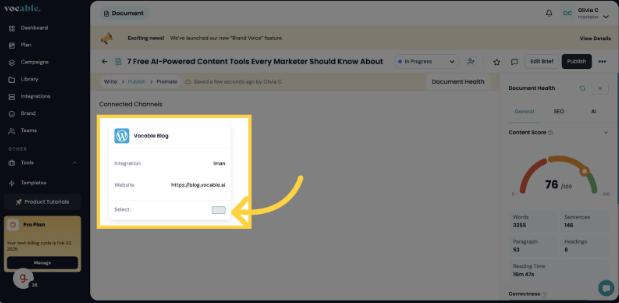
When you’re ready to publish a draft to your new wordpress blog..

You can select it under your ‘connected channels’
And fill out your post settings accordingly..

Then under publishing settings, you can pick either publish to publish your post immediately.
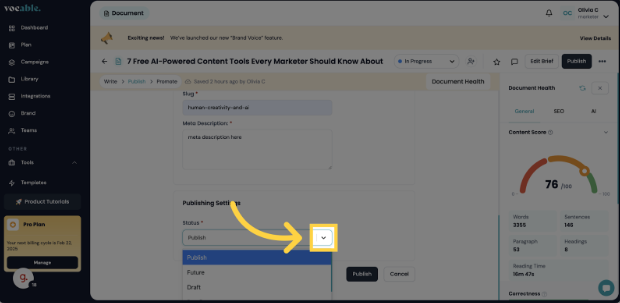
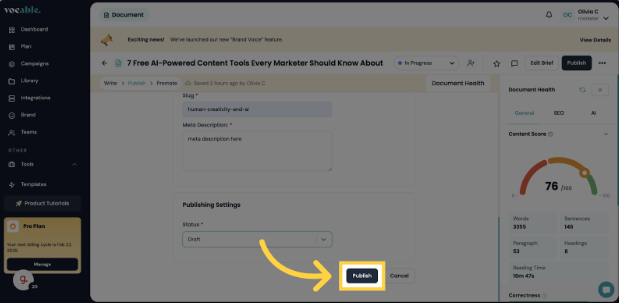
Or you can Click “Draft” to send your post to wordpress without publishing.

Then click “Publish”
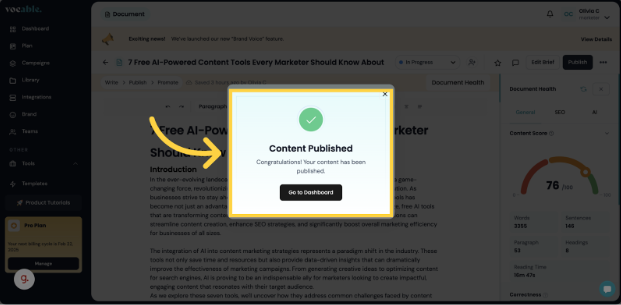
Et Voila.. your post is then published or sent as a draft successfully to your wordpress.
Related Guides
 Set Up A New Brand Profile Using a URL
 Use Vocable to Automate Your Content
Let our AI plan, draft, and optimize your content marketing.
Start Your Free TrialStill Need help?
We’re here to assist you!
If you’re stuck or have questions, our support team is ready to assist. Reach out, and we’ll get you back on track.
Contact Us
Special Limited Time Offer
Start Using AI For Content Marketing In 7 Days with our Free AI Crash Course
Send Me The Free Email CourseWhat You Will Learn


Learn AI Content Marketing
With Real Examples
Build Your AI-Led Content
Operations Strategy
Access 4700+ Prompts
Database
Bonus #1
4,000+ Prompts for Content Marketing
Bonus #2
List of AI Content Marketing Tools
And Get Answers to Your AI Content Challenges
Join Vocable's AI Content Creator Community